


Crafting a Rustic Masterpiece: Building a Dining Table from Reclaimed Wood
The aroma of aged wood, the whisper of stories embedded within its grain â€" reclaiming wood offers a unique opportunity to create furniture imbued with character. This guide walks you through the process of building a stunning dining table using reclaimed lumber, transforming salvaged pieces into a centerpiece for your home.

Gathering Your Reclaimed Wood
The heart of this project lies in sourcing your materials. Finding the right reclaimed wood requires patience and a keen eye. Consider visiting salvage yards, demolition sites (with proper permissions), or even contacting local demolition contractors. Look for wood planks with interesting textures, knots, and color variations. Aim for planks of consistent thickness (ideally 1.5-2 inches thick for a sturdy table) and length, but remember, imperfections add to the rustic charm. Assess the wood for any significant rot or insect infestation before purchasing; sound structural integrity is paramount.
Choosing the Right Wood
While many types of reclaimed wood work beautifully, some are more suitable than others for a dining table. Hardwoods like oak, pine, and chestnut offer excellent durability and stand up well to daily use. Consider the overall aesthetic you're aiming for. Darker woods create a more formal feel, while lighter woods offer a brighter, more airy ambiance. Remember to purchase enough wood to account for potential waste during milling and construction.
Preparing the Reclaimed Lumber
Once you’ve acquired your wood, thorough preparation is key. This stage involves cleaning, milling, and leveling your planks to ensure a smooth, stable tabletop. Begin by brushing away loose debris and dirt with a wire brush. Inspect each plank carefully, addressing any cracks or splits with wood glue and clamps to secure them. A planer is invaluable here; it will ensure consistent thickness and a smooth surface. If you lack access to a planer, consider having a lumberyard mill the planks for you. After planing, carefully sand the planks to a fine finish, progressing through different grit sandpapers for a flawless surface.
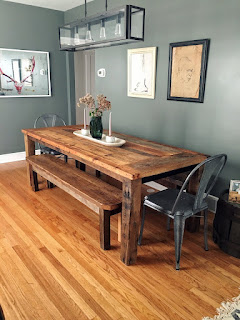
Creating the Tabletop
The tabletop is the focal point of your dining table. You have several options for assembling it. You can create a single, wide plank tabletop from multiple smaller planks, carefully joining them edge-to-edge using wood glue and biscuits (small, oval-shaped wooden joinery pieces) for strength and alignment. Alternatively, consider creating a more rustic look by leaving small gaps between the planks, filling these gaps with epoxy resin for visual interest and structural integrity. After the glue has cured, clamp the planks firmly together and let them sit for at least 24 hours.
Constructing the Table Base
The table base provides both support and aesthetic appeal. A simple, sturdy design is ideal for a reclaimed wood table. Popular choices include a four-legged base, a trestle base, or even a pedestal base. You can construct the legs from square or rectangular reclaimed wood, ensuring that they are adequately sized and strong enough to support the weight of the tabletop. Use robust joinery techniques â€" mortise and tenon joints are excellent for durability. Consider using metal brackets or connectors for additional strength and stability, particularly for larger tables.
Finishing Touches
Once the base is complete, attach it securely to the tabletop using screws and wood glue. After the glue dries, sand any rough edges and apply a protective finish to your dining table. Consider using a clear sealant to preserve the natural beauty of the wood while protecting it from spills and wear. Alternatively, you can apply a stain to enhance the color and grain of the wood. Remember to follow the manufacturer's instructions carefully for both the sealant and stain.
Building a dining table from reclaimed wood is a rewarding project that results in a unique and beautiful piece of furniture. By following these steps and incorporating your creativity, you can craft a truly special heirloom for your home, one that tells a story of sustainability and craftsmanship.